SELF STUDY/Flutter
[Flutter] Image Blur effect | 이미지 흐리게 하기 | 흐린 이미지 배경에 넣기 | BoxDecoration | BackdropFilter | ImageFilter
호이호이호잇
2024. 4. 26. 01:30
728x90
반응형
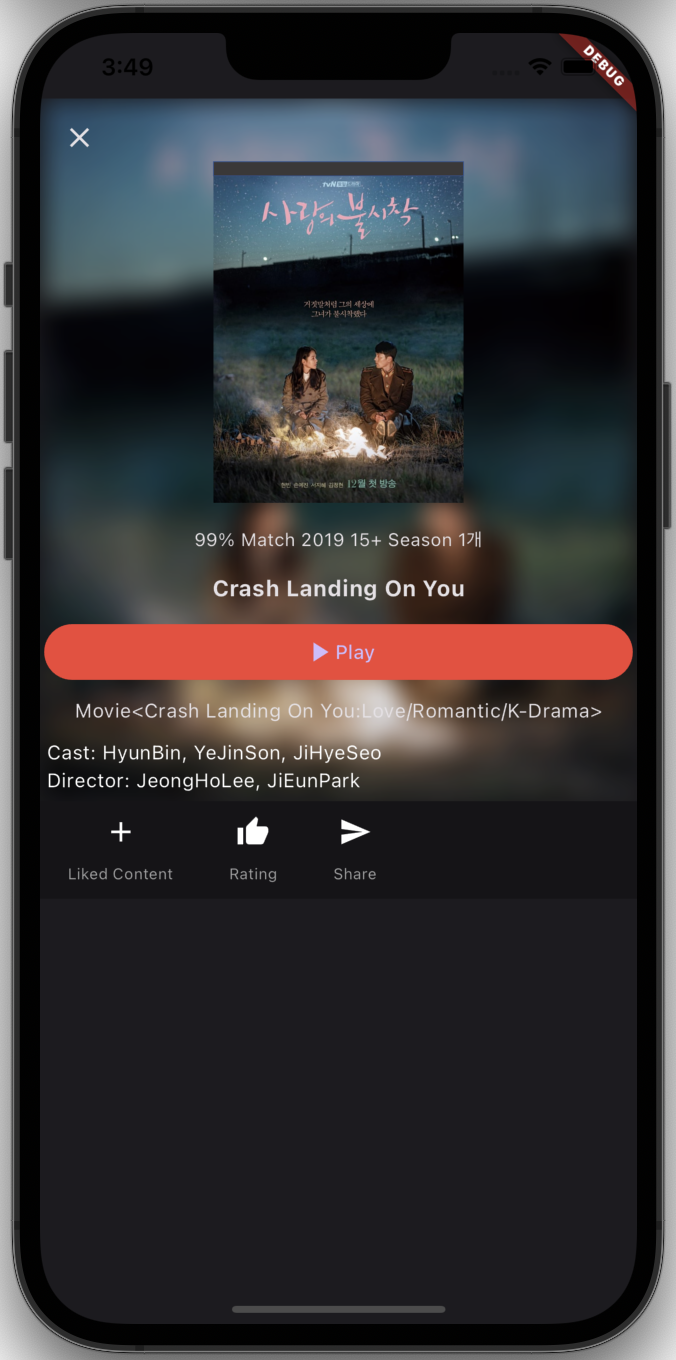
위 사진 처럼
불러 처리된 이미지를 배경으로 하고, 그 위에 실제 이미지를 올리는 기능을 구현해보자!
Blur
1. BoxDecoration 을 이용해 이미지를 불러온다.
BoxDecoration : https://api.flutter.dev/flutter/painting/BoxDecoration-class.html
Container(
   width: double.maxFinite,
   decoration: BoxDecoration(
      image: DecorationImage(
        image: AssetImage('이미지 주소'),
        fit: BoxFit.cover,
   ),
),
2. BackdropFilter를 이용한 블러 효과 적용
...
child: ClipRect(
  child: BackdropFilter(
  			// 블러 효과를 가로(sigmaX), 세로(sigmaY)에 얼만큼 적용 할 것인지
    filter: ImageFilter.blur(sigmaX: 10, sigmaY: 10),
    child: Container(
      alignment: Alignment.center,
      color: Colors.black.withOpacity(0.1), // 투명도 (0일 수록 투명 / 1일수록 불투명)
...
이렇게 하면 블러된 사진을 볼 수 있다.
그 위에 동일한 사진을 추가해보자.
...
child: Container(
    child: Column(
      children: <Widget>[
        Container(
          padding:
              const EdgeInsets.fromLTRB(0, 45, 0, 10),
          height: 300,
          child: Image.asset(
              '이미지 주소'),
        ),
...
실제 전체 소스 코드는
...
@override
  Widget build(BuildContext context) {
    return Scaffold(
      body: Container(
        child: SafeArea(
          child: ListView(
            children: <Widget>[
              Stack(
                // + Blur effect on poster.
                children: <Widget>[
                  Container(
                    width: double.maxFinite,
                    decoration: BoxDecoration(
                      image: DecorationImage(
                        image: AssetImage('images/${widget.movie.poster}'),
                        fit: BoxFit.cover,
                      ),
                    ),
                    child: ClipRect(
                      child: BackdropFilter(
                        filter: ImageFilter.blur(sigmaX: 10, sigmaY: 10),
                        child: Container(
                          alignment: Alignment.center,
                          color: Colors.black.withOpacity(0.1),
                          // Blur effect on poster. +

                          // + origin poster
                          child: Container(
                            child: Column(
                              children: <Widget>[
                                Container(
                                  padding:
                                      const EdgeInsets.fromLTRB(0, 45, 0, 10),
                                  height: 300,
                                  child: Image.asset(
                                      'images/${widget.movie.poster}'),
                                ),
                                // origin poster +
...
이렇게 구현이 된다.
디버깅 :
뒤에 불러된 이미지 배경 위로 실제 이미지가 올라온 것을 확인 할 수 있다!
728x90
반응형