안드로이드 스튜디오에서 직접 git을 연결하여 수정사항을 적용하고, 다른 장소에서 수정사항을 업데이트 받고 싶었다.
그래서 알아본 git과안드로이드 스튜디오!
1. Android Studio repository 생성
VCS > Import into Version Control > Create Git Repository

프로젝트 상위 폴더 선택

이제 repository가 local 에 생성이 되었다.!
2. gitHub에서 Personal access tokens 생성
이제 local 에서 git 계정의 저장소로 반영하기 위해서는 personal access tokens가 필요하다.
아래 github 사이트에서 본인의 계정으로 로그인 한 뒤 진행한다.!
GitHub: Where the world builds software
GitHub is where over 56 million developers shape the future of software, together. Contribute to the open source community, manage your Git repositories, review code like a pro, track bugs and feat...
github.com
계정 프로필 > Settings > Developer Settings > Personal Access tokens > Generate new tokens

적용 범위 클릭 > Generate token
repo, admin:org, admin:repo_hook, gist, delete_repo 를 적용해야만 android studio 에서 사용 가능


생성된 시리얼 복사

3. Android Studio - share repository
이전에 생성한 저장소를 github에 공유를 해줘야한다!
VCS > Import into Version Control > Share Project on Github

Repository 이름과 리모트 이름을 지정해 준 뒤, 위에서 복사한 시리얼을 입력하면 된다.

블로그에 적기 전에 혼자 테스트 삼아 해봤는데, 한 번 저장되면 삭제하지 않는 이상 안되는 것 같다.
나중에 다른 PC 세팅 할 때 사진 따로 추가해야지!
저장소 생성이 끝나면, 기본소스를 push해서 반영을 해야한다.
4. Android Studio - git add/commit/push
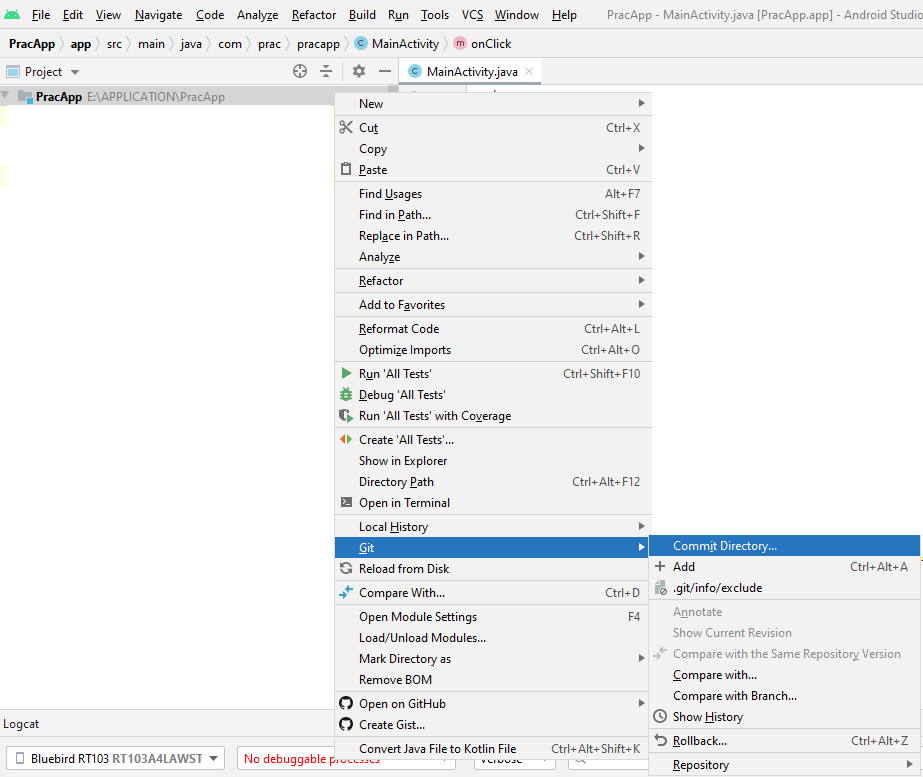
폴더 구조 형식을 "Project"로 변경
제일 상위 폴더에서 오른쪽 마우스 클릭 > Git > Add
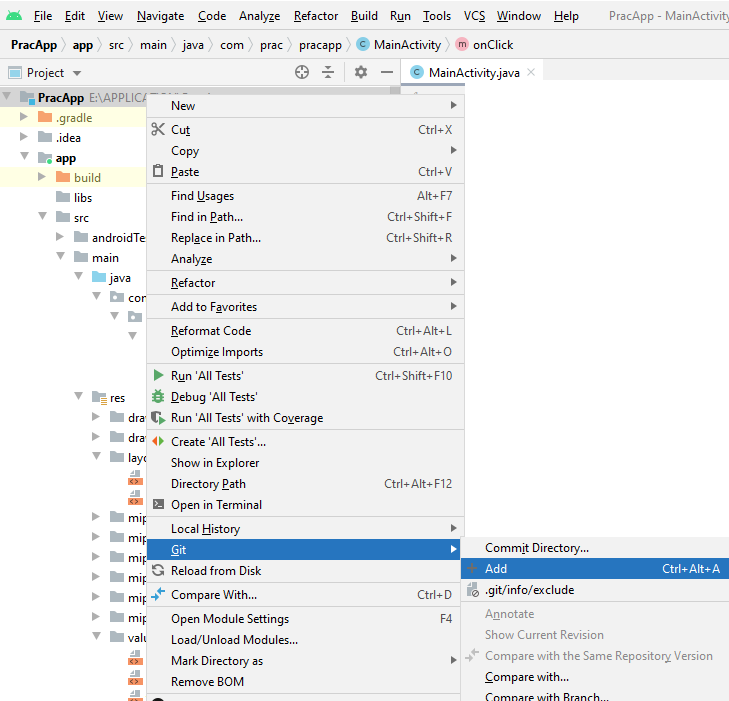
제일 상위 폴더에서 오른쪽 마우스 클릭 > Git > Commit
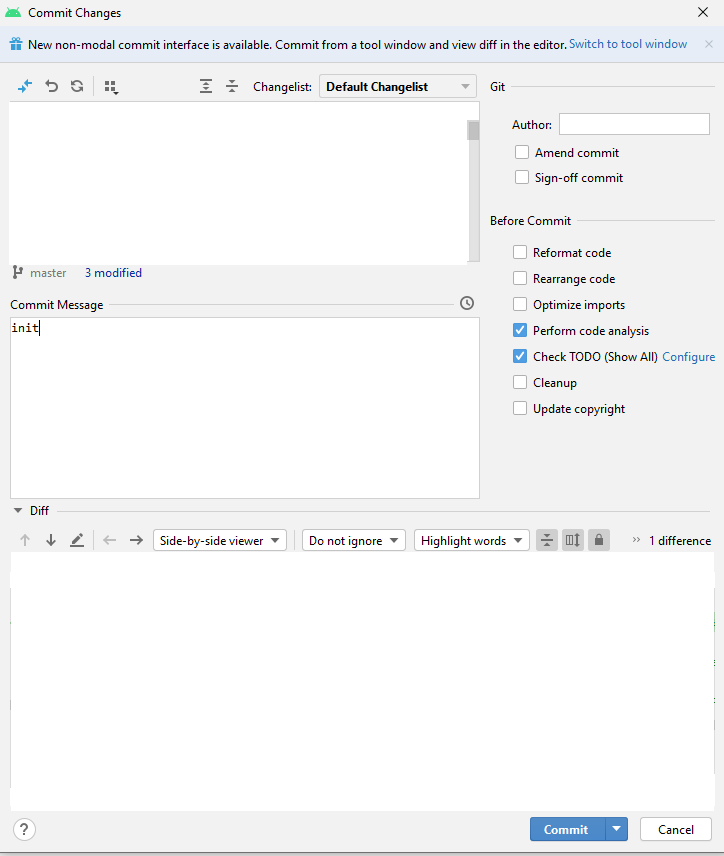
Commit message 입력 후 Commit
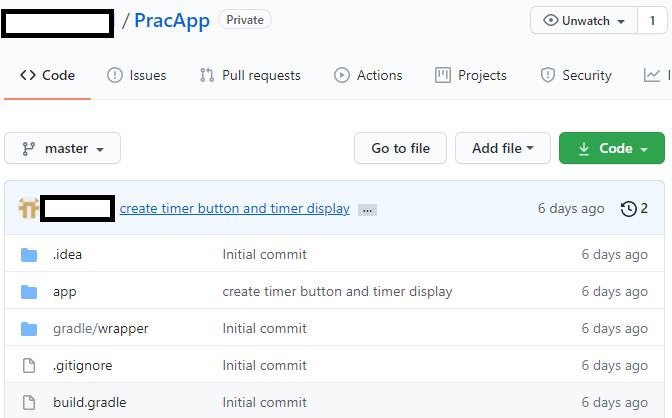
Commit을 누르고 다시 github로 들어가면 push가 정상적으로 된 것을 알 수 있다.!
예전에 해두었던거라 commit 내용이 다르지만 ..
이제 정말 안드로이드 만들어봐야지!
끄읐
'WORK > Android' 카테고리의 다른 글
| [Android] Jack server 빌드 에러 (2) | 2021.05.11 |
|---|---|
| [Android] storage 접근 권한 요청, 처리 (0) | 2021.04.13 |
| [Android] 안드로이드 제공 vector 이미지 추가 | 안드로이드 버튼 아이콘 추가 (0) | 2021.04.09 |
| [Android] WiFi adb 연결 (0) | 2021.03.24 |
| [Android] Pixel 3XL Image Flash (9) | 2020.09.22 |