728x90
반응형
클릭하면 바로 주소로 이동가능하도록
텍스트를 삽입하는 방법에 대해 알아보겠다!
1. 패키지 설치
먼저 필요한 패키지를 보면,
- Linkify : 주소 텍스트를 클릭 가능하도록 함.
- Url launcher : 실제 주소로 이동이 가능하도록 함.
이렇게 두 가지 패키지가 필요하다.
두 가지를 설치해준다.
pubspec.yaml
dependencies:
  flutter:
    sdk: flutter
  carousel_slider:
  flutter_linkify: #for using clickable link
  url_launcher: #for executing link
이렇게 파일을 수정하면 자동으로 필요한 package 가 설치가 된다.
2. Linkify 사용
https://pub.dev/packages/flutter_linkify 참고
(1) import
자동으로 import가 될 것이지만 더블 췍
import 'package:flutter_linkify/flutter_linkify.dart';
(2) 사용
기본적인 사용법은
Linkify(
onOpen : 클릭 시 동작
text : 클릭이 가능하도록 할 텍스트
);
이렇게 생겼다.
공식 홈페이지에 나와있는 예제 :
import 'package:flutter_linkify/flutter_linkify.dart';

Linkify(
  onOpen: (link) => print("Clicked ${link.url}!"),
  text: "Made by https://cretezy.com",
);
2. launchUrl
https://pub.dev/packages/url_launcher 참고
(1) import
import 'package:url_launcher/url_launcher.dart';
(2) 사용
실제 사용 시에는 주소가 올바르지 않을 경우 / 접근이 불가 할 경우를 대비하여 !await launchUrl(_url) 로 꼭꼭 Exception 처리를 해줘야한다.
if (!await launchUrl(_url)) {
	throw Exception('Could not launch $_url');
}
3. Linkify & launchUrl 함께 사용
Linkify 공식 홈페이지에 나와 있는 예제 :
import 'package:flutter_linkify/flutter_linkify.dart';
import 'package:url_launcher/url_launcher.dart';

Linkify(
  onOpen: (link) async {
    if (!await launchUrl(Uri.parse(link.url))) {
      throw Exception('Could not launch ${link.url}');
    }
  },
  text: "Made by https://cretezy.com",
  style: TextStyle(color: Colors.yellow),
  linkStyle: TextStyle(color: Colors.red),
);
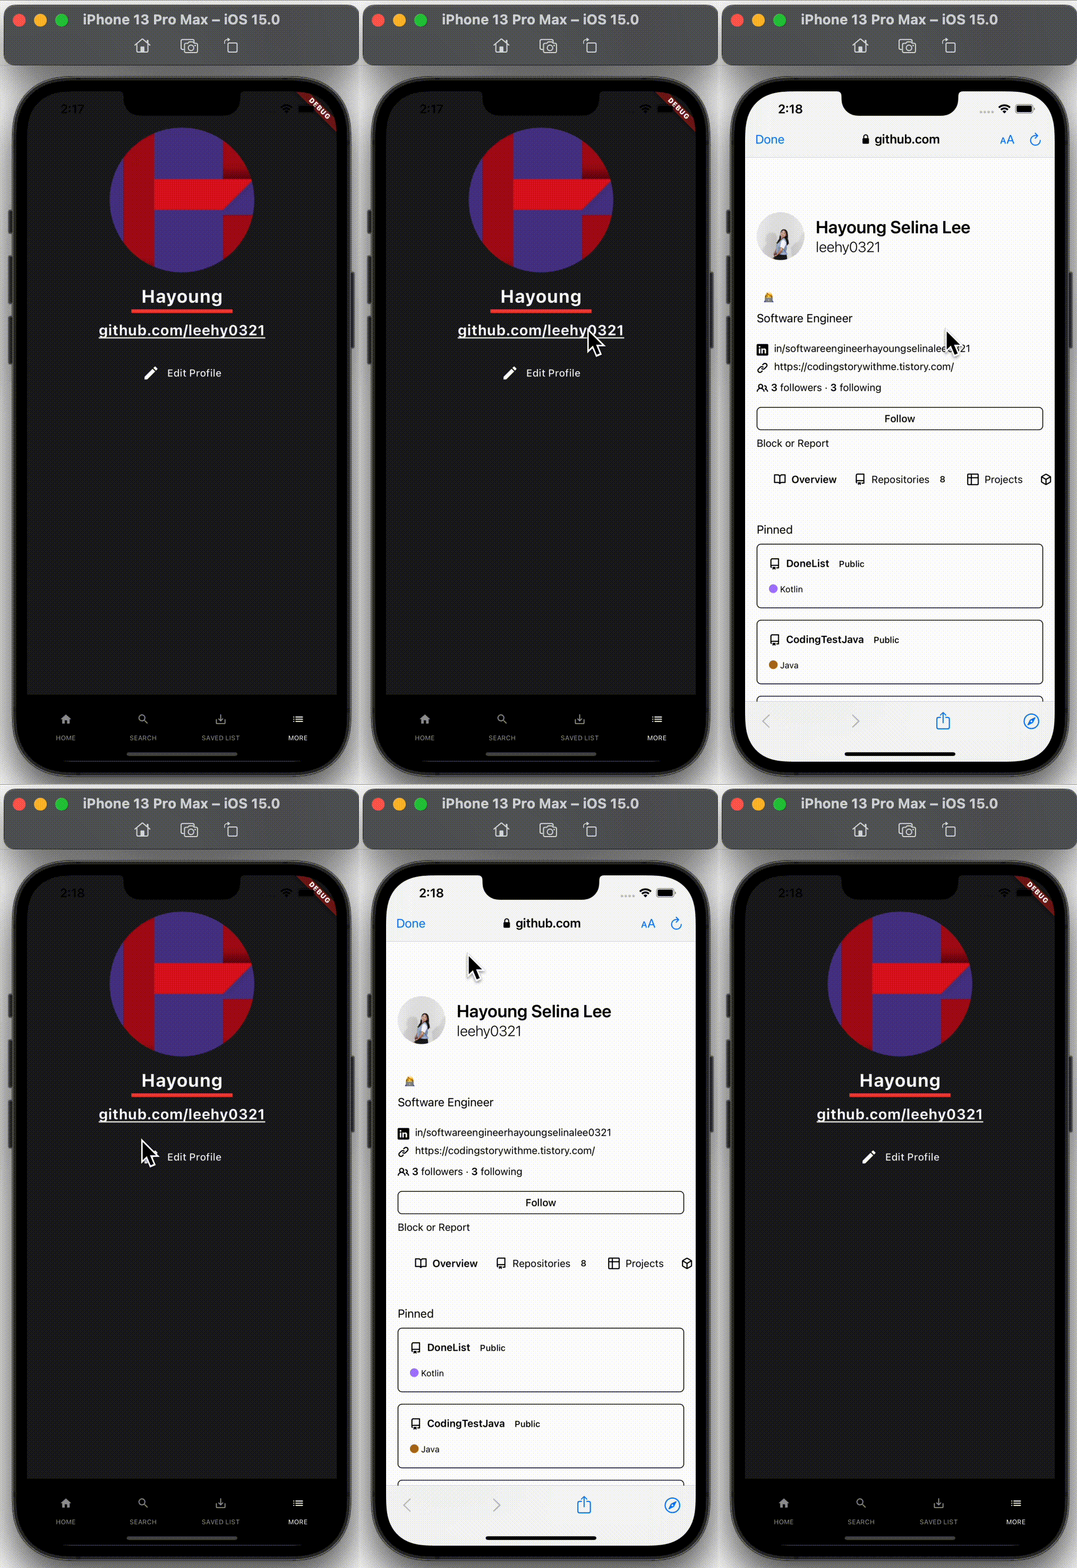
내가 만든 예제 :
Linkify와 launch Url을 함께 사용하여, 깃 허브 주소 클릭 시 깃 허브로 이동하는 것을 구현
Container(
  padding: const EdgeInsets.all(10),
  child: Linkify(
    onOpen: (link) async {
      if (!await launchUrl(Uri.parse(link.url))) {
        throw Exception('Could not launch ${link.url}');
      }
    },
    text: "https://github.com/leehy0321",
    style: const TextStyle(
    	fontWeight: FontWeight.bold,
        fontSize: 20
    ),
    linkStyle: const TextStyle(color: Colors.white),
  ),
),
이런식으로 잘 구현 할 수 있다.!

728x90
반응형